If you go to the beach, then use protective cosmetics for hair with SPF-filters. These can be oils that protect sprays, fluids, waxes. In addition to protection, they give the hair a shine and a pleasant aroma.
What they do with their image of a girl and a woman to stand out on the beach. And the original hairstyle is one of the most important components of the desired image.
Owners of long and wavy hair often prefer styling "Wet strands." To create it you need colored stealth and water. And it is done very simply. Initially, the hair is moistened with water from the roots to the tips and combed back, leaving the forehead open. Then the sides of the hair are divided into several thin strands, which cross at the top of the head and are fixed invisible on the same level. From moisture, curls often curl heavily without additional effort.
Especially beautiful hair looks back, as each strand remains separate even when the hair dries. If the wind suddenly rises and slightly rubs the styling, the hairstyle takes on a somewhat sloppy look. And on the beach it looks very sexy.
You can also apply any fixing agent to the curled strands - this will prolong the life of the hairstyle. When choosing a styling product, consider its degree of fixation. The rule is this: the less hair curls, the stronger should be the fixing agent. And for hair that is perfectly curled by nature, such a tool may not be needed at all.
The highlight of your style - the effect of wet hair
To maintain the effect of wet hair should use gel. But we must remember that this tool makes the hair straight, and also slightly weights them.
For girls with straight hair, there is also a wide variety of hairstyles for wet hair. In each season a bunch with the effect of wet strands is very popular. To create it, hair is treated with gel, combed back and curled into a large coil, which is fixed with pins. Some stylists consider such a beam as an excellent option for publication. The ends of the beam are sometimes left free: this gives a zest to the hairstyle. In order for the tips to hold, you just need to sprinkle them with varnish.
The original hairstyle for wet and straight hair can be done as follows: tie a horse's tail and wind it around the elastic. Summer decorations are combined with this hairstyle, for example, a huge bright flower. With him you turn into a real queen of the beach. In addition, the relevant fixing crab, hairpins in the form of butterflies, various scallops, beads and ribbons.
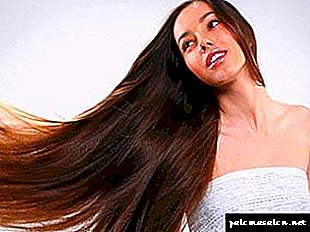
The effect of wet hair is always popular. And it can be done both on all the hair, and only on some part of the head. It all depends on your desire and imagination. It is worth mentioning that wet strands are particularly suitable for owners of dark and thick hair. Stylists see this as unprecedented naturalness and beauty.
Please support our project like!
There are times when there is not enough time to dry hair. Or, on the contrary, on hot days it is pleasant when the hair is slightly damp and cools the scalp. One way or another, you should always stay on top. I will tell you about several options. hairstyles for every day on wet hairsimple and, at the same time, charming.
1. High tail
- For this extremely simple and stylish hairstyle, you will need an elastic hair tie and comb with fine teeth.
- Gather the hair at the top of the head.
- Using a comb, smoothly comb the hair into a ponytail.
- If necessary, swipe your hair with your free hand to achieve the desired smoothness.
- Secure the tail with a rubber band.
- I advise you to focus on the elastic band. It should be strong enough and elastic to keep your hair.
2. Low stabbed tufts
- To create such a hairstyle will only need studs and 5 minutes of time.
- Comb the hair back, divide it into three equal parts.
- Twist the middle part of the hair and secure it with hairpins in a bun.
- Do the same with the right side of the hair.
- Similarly, do the left side of the hair, securing it in a bun at the same level. It is advisable to pass several studs at once through two beams - right and middle, left and middle. This will help to fix the hairstyle.
- In three bundles your hair will dry much faster than in one. In addition, dismissing the hair, you get light waves on hair.
3. "Fishtail"
This hairstyle looks amazing and creates the impression of a complex weaving technique. However, to make it very simple. How exactly - I will now tell you in detail.
- You will need two hair ties: one elastic, able to hold your hair, and the second thin, to secure the tip of the braid.
- Gather the hair in a high tail. This will help you to the previous hairstyle instructions. Secure the tail with an elastic elastic.
- Divide the resulting tail into two parts. For more convenient weaving, it is recommended to keep each part separately in the hand.
- We proceed directly to the weaving itself: we separate a small strand of bands from the outer side of the right side and connect it crosswise with the inner side of the left side of the tail.
- Now, the same thing needs to be repeated on the other side: a strand of hair from the outer side of the left side is thrown to the inner side of the right side of the tail.
- In fact, everything happens much easier. Adhering to the instructions from the previous two points, you need to move down the tail, gradually braiding the strands crosswise.
- The resulting braid must be secured with a thin rubber band.
- This hairstyle can look very diverse. For example, to make the braid more voluminous, need to slightly stretch the strands already braided hairstyles in opposite directions. This should be done very carefully so as not to destroy the hair. Besides, the thinner the strands, the more elegant the braid looks, but in this case, it will take more time to create it.
Having mastered this weaving technique, you can weave decorative ribbons into a braid, which will help to make your hair very original.
4. Bundle on the basis of "fish tail"
This hairstyle is a kind of continuation of the previous one.
- To create this hairstyle you will need two elastic bands: strong and thin to secure the tip of the braid, as well as the studs.
- Following the above instructions, braid the fishtail braid and stretch its strands, making the hair look voluminous.
- Twist the resulting braid on the back of the head, forming a beam. The tips of the hair, I recommend hiding under the beam so that they do not fall out of the hair.
- Fasten the resulting beam with hairpins, paying special attention to the part where hair tips are hidden.
5. Smooth low beam
This is a classic version of the hairstyle, which is suitable for any event..
You can to dissolve her, after the hair is dry and get big waves.
- You will need an elastic hair tie and hairpins.
- Comb the hair back and secure it with a rubber band in a low tail.
- Twist the tail into a bundle and wrap it around the gum, forming a low tuft.
- Secure the bundle with hairpins, hiding the tips of the hair under it.
- Run a fine-toothed comb through your hair so that the hairstyle is perfectly smooth.
I also advise using decorative studs that will make the beam less stringent.
6. Triple beam
- To create such a hairstyle you will need hairpins.
- Divide the hair into three parts. Run the comb through the temples, thus separating the upper part of the hair. I recommend it while stabbing the top. Divide the rest of the hair in half.
- Twist the lower left part of the hair tightly and make a bundle from it, securing it with hairpins.
- The same should be done with the lower right part of the hair. For better fixation, I recommend threading several studs at once through both beams.
- We now turn to the top of the hair. Run your fingers through the hair to straighten them, but do not brush them too smoothly.
- Make a bundle from this part of the hair, placing it directly above the bottom two, and fasten the obtained hairstyle with hairpins.
- The resulting hairstyle looks loose, this effect does not create smoothly combed hair.
Releasing bundles, you get light waves almost the entire length of the hair.
7. A bundle with a Greek braid
I offer you the original version of the beam - simple in execution and looking very unusual.
- To create such a hairstyle you will need elastic hair tie and hairpins.
- Comb your hair on the left side.
- Above the right temple highlight two small strands - one along the hairline, the other behind it.
- The inner strand is twisted into a bundle, after which we throw on the outer strand and twist them together.
- Stepping back a short distance, along the hairline, we select a new strand and add it to the twisted one, after which we combine them.
- We continue to follow further along the hairline, gradually adding new ones to the original strands. As a result, there should be a thick strand of hair.
- After passing the ear, add the rest of the hair to the twisted strands and fix them in a low lateral tail. Twist the tail and wrap it around the gum, forming a lateral bundle. Secure it with hairpins, hiding the ends of the hair inside.
You can decorate the received bunch with decorative hairpins or hairpins.
High tail

When the hair is wet, it is better to do smooth hair, such as this simple high tail.
With my own hands in stages:

- Gather all the hair high on top.
- Use a comb to get rid of lumps and cones. Check your fingers for perfect smoothness and smooth out any irregularities.
- Tie the tail with an elastic but elastic band. Do not forget that wet hair is easier to injure.
Fishtail hairstyle for medium hair

Do not worry, the fishtail braid looks very complicated, but in fact weaving the fishtail braid is easy.
Technique performing hair:
- Collect the tail high on the crown as well as in the upper version.
- Divide the tail into two parts. Hold one piece in each hand.
- Cross a small section from left to right. Take a small strand on the left side of the left tail and combine it with the right tail.
Repeat on the right side. Take a small piece on the right side of the right tail and combine it with the left. - Repeat this process to the very tips each time, crossing a small strand from one tail to the opposite side. As you move down the tails intersect, forming a fishtail braid.
- Secure the end of the braid with a small transparent rubber band.
- Gently pull the strands on each side, which will make the hair look thicker and fuller and will emphasize the shape of the braid.

You can also try braiding a fishtail braid on the side or bottom.
Fishtail - a bunch of medium hair

The fishtail is beautiful on its own, but you might like this version of hairstyle for every day if you work somewhere in the office.
Technology implementation hairstyles:
- Tie a high tail and weave a fishtail braid, as in the previous version.
- Make sure the tail is bound tightly and will not fall off when the hair is dry.
- Roll the braid around the rubber band, forming a bun.
- Turn the tips inward and secure with a barrette.
- The folded fishtail creates a larger texture and volume than a regular bundle. At the same time later, after drying, they will acquire a pleasant uniform waviness.

If there is no time for weaving a fish tail, you can braid a regular braid in 5 minutes in three strands, and it will also look great.
The easiest and most elegant version of the hairstyle for wet hair - a classic low bun. 
With my own hands in stages:
- Comb the hair back and fasten it in a low tail on the back of the head.
- Wrap it tightly with a strand around it to form a low bagel.
- Hide the ends with pins.
- Smooth the unevenness of the comb.
As in the first embodiment, the upper part of the hair is smoothed, but it creates a good wave from the shoulders down after drying.
If the hair is very thick or thick, it may turn out that they will need more time to dry in this tightly twisted bundle.
In this case, it is better to do a triple beam, as in the first embodiment or as shown below.

Technique performing hair:
- Divide the hair into three parts - the upper part is on the crown above the level of the ears and the remaining lower part is divided. While holding the top of the clip.
- First roll the strands from the bottom left into a bun. Then repeat the same with the other two parts.
- If you allow the length, you can twist in the form of eight bottom right with the transition to the top.
All buns are an excellent option for hairstyles for every day for the summer, because they can be done in 5 minutes and they look free and less formal.
If the medium hair is almost dry, you can fold bunches of smaller pieces to help shape the curls at the ends.
Rope on the contour of the face

The hairstyle will help to create a small waviness, and you can make this kind of string both tight and loose, depending on how much more comfortable it feels or fits the occasion.
With your own hands step by step:

- Make a deep side parting on the right and comb the hair on the left.
- Begin to twist the rope to the side of the parting. Take a small strand and twist it under the strand taken from the growth line.
- Turn them together, then wrap them under the next strand of hairline.
- Continue until you reach the ear, then connect the braid with the rest of the hair and collect the tail.
- Twist it to make a bundle.
- Secure with a barrette.
Hairstyles with your hands for 5 minutes on wet hair - the best way to quickly put your head in order after the beach, pool, gym, or just when there was no time left in the morning before going out.
Hairstyle 4

Make a high tail, follow the recommendations of the previous master class.

Step 2: Divide the tail into two parts. Take a small strand from the left side and align it with the right one.

Repeat the same in mirror image.

Step 4: Continue to alternate the strands until the end of the tail. As you move downward, the crossed strands form a fishtail braid.

Step 5: Tie a rubber band at the end of a pigtail.

Step 6: Strand on both sides gently stretch, the braid will become more lush and thick.

Hairstyle 5

Carefully comb and collect the hair in a high tail. Smooth the crown with your hands so that the grooves from the comb become invisible.

Step 2: Divide the hair in the tail into two parts. Start crossing small strands by adding them to the main lobes.

You should have a classic fishtail. The advantage of this hairstyle option is that it is not necessary to weave a perfectly symmetrical pigtail.

Pull the spit coils on both sides, thereby gently add the volume to the fish tail.

Twist the braid clockwise around the base.

Hide the tip quietly under the beam.

Step 7: Fix hair with hairpins and invisible.

A bundle can be made from ordinary braids, it will turn out no worse than from a fish tail.
Following example

Comb the hair back, you can spray on the comb with a tool for smoothness, then the comb will slide like a silk.

Step 2: Attach them to the low tail on the back of the head. Before that, rub the hair with your palms, masking the traces of the comb.

Step 3: Twist the tail into a thick spiral.

Step 4: Twist the snail out of the harness. In step 3 and 4, make rotational motions in the same direction.

Step 5: Tie the hair ends under the bagel and fasten it with pins.

Step 6: If necessary, run the comb through your hair again.

Ladoskih hairstyle bring to the perfect look, as in the photo.

Divide the hair into two parts horizontal parting over the ears. Secure the top with a barrette and split the bottom of the hair in half.

Twist the left side and fold it into a bundle, secure stealth.

Do the same with the right side.

If required, add extra studs for durability.

Now go to work with the upper part.

Using your fingers, comb the hair back, so that a small amount is formed at the roots.

Make the third bundle over the previous two.

Secure it with shaped stealth.

Hairstyle is ready, after drying, you will get pretty curls on the tips of the hair.
Tight tail with a "harness"
If you feel uncomfortable when wet hair falls on your shoulders or neck, this hairstyle is for you! Tie up the curls in a tight and high enough tail, and then twist them into a “bundle”. To do this, divide the hair into two equal strands, twist them around you in a clockwise direction. Then twist the resulting flagella between them counterclockwise.
After that, secure the ends with a thin rubber band.
Any bundle is a win-win for the beach. This hairstyle is especially practical with gusty wind.
What stylish hairstyle can be done on wet hair?
When choosing any hairstyle and styling, there are two important points for making an unmistakable choice - this is the type of hair and the shape of the face. They will certainly decorate stylish hairstyles on the wet hair of owners of curvy and curly long curls, for them this is a great opportunity to quickly and simply diversify their own image.
No less beautiful, especially in complex smooth styling, look absolutely long, straight, but thick curls. And in that not in another case, you can keep your hair and do without styling, drying your hair under their own weight will keep the impression of wet. But the owners of thin hair, as well as those who wear a haircut, will have to use an easy fixing styling - foam or mousse to maintain the style of this styling.


When choosing which hairstyle you can do on wet hair, please note that it gives your hair a special complex volume. If you are the owner of a round or “square” face, choose styling with voluminous side strands, without too carefully combing the locks from the forehead and temples.
Narrow, elongated, and even more ideally oval faces will decorate any styling with smoothly combed hair over the forehead and at the temples, complemented by a fancy tuft or tail on the back of the head.


When choosing the best option for yourself, never forget that such styling is perfectly combined with images in any informal style, perfectly meet the canons of everyday, urban and evening style, but you should not do such informal creative styling for work, unless you are a representative of a creative profession. . With images in a business style, they are not combined.
Hairstyle "wet chemistry" at home (with photo)
One of the most spectacular, and at the same time simple in execution is the “wet chemistry” hairstyle. Become a couple of days the owner of curly and stylishly laid hair can literally everything, while not harming your hair with a real perm. It looks especially beautiful on long - no shorter blades - rather thick hair, but keep in mind that small curls will make your hair visually shorter. Make a "wet" hair at home as a professional stylist is quite simple, just follow a few rules.


To create it, you need mousse and strong fixation foam, curling tongs or small curlers. And if your hair is curly or wavy from nature - a special spray for the formation of curls. To form the desired silhouette and design tips may need a gel or wax. To make your hair look beautiful and be obedient, use not only shampoo, but also conditioner. It will not be superfluous to make a mask on hair, nourishing or moisturizing, before laying.


Lightly dry, literally a couple of times blotting them with a towel, apply styling along the entire length of the curls, paying particular attention to the roots and tips of the strands, and curl your hair into sharp, small vertical curls with the help of curlers or tongs. By nature, curly hair should be simply divided into strands, highlighting each with the help of styling and shaping it with your fingers. In this and in another case, styling should not be combed - an exception can be made only for a comb with large teeth and to dry hair only in natural conditions.
Blow-drying will not give the effect you are seeking. Correct the result with a gel or wax, but use them very carefully, paying particular attention to the strands around the face and the ends of the hair. One has only to get carried away, and you risk getting not fashionable "chemistry", but an untidy kind of hair. Hair can be left flowing, and you can collect them in a free tail and a bunch on the back of the head. "Chemistry" will support any fantasy styling without additional funds, just a pair of hairpins or hair tie.
See how stylish and stylish wet hairstyle hairstyles look on these photos:


Hairstyle "wet waves" on sparse hair
A very elegant hairstyle “wet waves” is created in the same way, but unlike “chemistry” it looks best on short and even sparse hair, allowing you to change, for example, such haircuts as “bob”, ordinary and asymmetrical, or beautiful “square” middle length. In this case, you will need large curlers, styling strong fixation and a little hair gel to effectively decorate the side strands and tips of curls.


Wet hair at home will require not so much skill in execution, how much time. To dry the hair curled and laid in such a way is surely worth only in natural conditions, without using the same hair dryer.
Impressions of wet strands allow you to achieve any styling suitable for your hair type, but it is worth to apply them very little, starting with a small one and gradually adding as the styling is formed.
How to make a “wet hairstyle” for long hair


Neatly done styling in this style is good in itself, and with properly chosen styling, it can maintain its effect for two to three days, and allows you to experiment. For example, to make a wet hairstyle for long hair on the basis of a classic or horse "tail", although he himself looks great in combination with this texture of styling curls. No less feminine styling options can be created by dividing the “tail” into two or three equal strands and using studs to lay them “nests”, gently hiding the tips.


Also on the basis of the "tail" you can create a different type of braids, regular, French or inverted - they will look more impressive thanks to the texture of the curls. You can put them in a very beautiful hairstyle in a variety of ways, and in a complex bunch, and in a classic, and in an asymmetrical "crown". According to hairdressers, even a novice can make such a “wet hairstyle”, and this style is held up over a period of time much better than that done on unwet hair.
Hairstyles for wet hair made at night


Get up in the morning with a beautiful styling allow hairstyles for wet hair, made for the night. What exactly to do - it depends only on whether you want to receive large or small curls, but in any case, you should start with washing and moisturizing the hair. Lightly dry them with a towel, without using a hairdryer and carefully comb. If the hair is sufficiently thin and unruly, apply a foam or mousse on it that is suitable for the hair structure.


In order to get large curls or waves, tilt your head down, gather still wet hair in a ponytail, and then twist it into a tight bundle. Using a soft and wide elastic band, make the most tight bunch on the top of the head. In the morning, it will be enough to comb the curls with a comb with rare teeth and slightly beat them with your hands.
Look at the photo, “wet” hairstyle looks very elegant and feminine:


Trendy "wet" hairstyles for short hair


“Wet” hairstyles for short hair also differ in diversity and allow to reinterpret almost any fashionable haircut. Semi-long haircuts are best for such styling - variations on the theme of the classic “bob”, or “bob” and any asymmetrical variants. The way they are created is simple, wash your hair, moisten it with a balm or conditioner. Blot with a terry towel, so that they remain slightly damp and apply foam or mousse for styling over the entire length of the strands. On hair of any type, both absolutely straight and wavy, you can create different styling.


If you like fashionable casual care, just whip your hair with your hands. Forming additional volume at the crown, it is necessary forehead or at the back of the head - so as to form a beautiful silhouette.
Take a little wax or gel for styling, rub it in your palms and additionally walk at the roots and along the tips of the hair, forming separate strands,
It will take quite a bit of styling, since styling should make a natural impression. Strands can be disassembled using fingers or a comb with rare teeth. Creating such a package takes a minimum of time.
Hairstyles with “wet” curls on hair of any length


Somewhat more time and effort will require hairstyles with “wet” curls, they look great on hair of any length and allow you to create very feminine and, at the same time, trendy looks. Such as styling in the style of "retro". To create them, you will need ordinary, large curlers or hair curlers-boomerags, barber haircuts, ducks and two types of styling, one medium fixation and the second strong, such as gel or wax, as well as hair spray.


On cleanly washed and dried hair, apply the usual styling and smoothly comb from the forehead and temples to the back of the head. If you have long enough hair, curl them on curlers, if short - form curls and secure them with the help of the hairpins at the back of the head, tightly pressed to the head. So you can put and short haircuts, such as "bob" or "square on the leg, as a classic style, and asymmetrical.


Dry the hair in a natural way, the heated air from the hair dryer can break the texture of the “wet styling” and do not comb the resulting curls. Thin and not too thick straight hair should be slightly varnished, head bent forward - so you give them extra volume, and styling - durability. Tight, both straight and curly hair should not be further processed, to create styling enough of their natural qualities.
Elegant hairstyles on wet curls


Long hair can be laid in a fantasy bundle or roller, making them first in the "tail" at the top or the back of the head and securing the strands with curls and curls with the help of studs and invisible hairpins. They are also needed for short hair, leave the "cool" curls as they are, without combing, and gently pin them invisible, tightly pressed to his head. Hairpins, especially beautiful, you can not hide - this decor will only emphasize the style of styling.


You should have a flat styling pattern that exactly matches the “retro” style. Secure the styling varnish. Such hairstyles on wet curls - a great option for elegant evening exits, styling perfectly combined with both vintage and classic evening dresses.
Hairstyles with hair styling


The most difficult to create hairstyles with wet styling for owners of bangs of any style. The only exceptions are very long asymmetric bangs, which merge with one of the side strands. In the case of a short haircut with a long bang, styling can be done only on the bangs - making it the main focus.


And what to do with smooth, straight and oval bangs of any length? Effectively to lay them in this way will not succeed - “wet” and short strands of the person invariably create the impression of untidiness, not style. In this case, it makes sense to make a fashionable hairstyle on a wet head and a combined styling, beating contrasting solutions.


On the main body of hair make a "wet" styling, in any of the above ways.
At the same time, hair of medium length or long curls can be collected at the back of the head, in a free-style bundle or “tail”, roller, or braid of any style. But put the bang exactly as you usually do, straightened with the help of an ironing bang in combination with several loosely loose strands at the temples will look best.
Pay attention to how stylish, unusual and at the same time very fashionable hairstyles look on wet hair in these photos:
Hairstyle low bun
Water-moisturized curls are not yet a reason to abandon the usual tails and bunches. The latter can look especially feminine and elegant on wet locks, and a pleasant shine will give the hairstyle a special refinement. Wet styling on medium hair in the form of a low beam is a great option for an official meeting, going to work, etc.
Make your own hair do not make any difficulties:
- Dry curls with a towel to get rid of excess water.
- Using a wide comb, carefully comb your hair, parting it.
- Spread the styling gel over the curls so that the strands do not fluff when dried.

Photo: tail beam creation
- Comb the strands behind the ears and fix them with a rubber band in the back of the head.
- The resulting tail twist into a bundle.

In the process of twisting the harness
- Use your index finger to hook the harness at the base, and lift the end up.
- Twist the bundle in the shape of a figure eight, then fix it with a pin. In this case, the beam should not be too tight.

Twist the fragile eight-shaped bundle
Due to the unusual wet texture of hair, this hairstyle looks especially charming.

Tip! At the end of the installation, smooth the upper part of the head on both sides, starting from the forehead, moving towards the beam. To do this, it is better to use a comb with wide teeth, which will form attractive grooves, which will add zest to your image.
Wet tail
Tail - the basis of many hairstyles, and a wet tail - a magic wand, if you are late for an important meeting or a date. If you are the owner of curly locks - you are very lucky, because in this case the wet tail looks especially attractive.
Instructions for creating a tail:
- Apply to curly strands means for curly hair, not sparing its quantity.
- Wait a few minutes for the spray to work, forming clear curls.
- Carefully collect the hair in the back of the head. Raise the hair slightly above the ears and forehead to give a small hairstyle.

The process of formation of the tail and dropped pryadok
- To give the styling a touch of romance, you can slightly shake your head - several curls will fall out so that it looks very feminine and cute.
- Additionally, spray the dropped curls with spray to give them an outline.
- If you think that the volume is not enough - lift the hair in the area of the crown.

Give more volume on top
As you can see, a simple at first glance hairstyle due to wet hair can turn into an unusual and very feminine date.
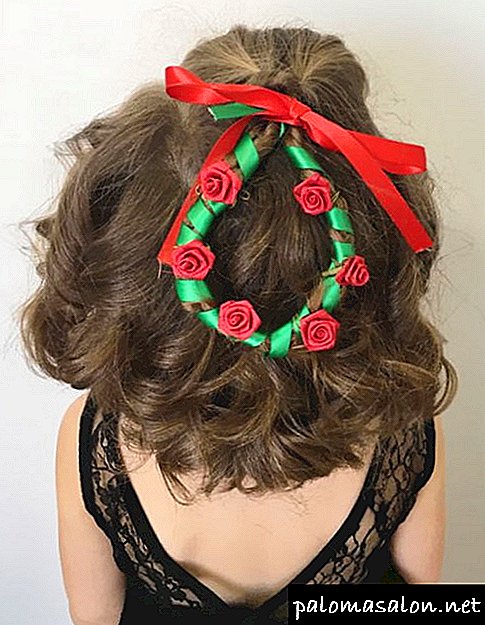
Original hairstyle from three bunches
This type of installation, as well as the previous ones, is very simple to perform, however, this looks attractive and even unusual.
The bottom line is that three bundles are formulated that are lined up in one line:

Three bundles - an unusual way of laying wet strands
- Spread the gel over the hair and comb it well using a comb.
- Separate the upper part of the strands from the side of the forehead and to the upper line of the ears (as for Malvinki), for this you can use the tip of a thin comb or the fingers of both hands.

You can use the fingers of both hands to separate the pieces of hair.
- Comb the upper part back and formulate the first small bundle, by first twisting the strands into a harness. Secure all with a pin or stealth.
- Separate the next part of the hair approximately in the middle of the head (on the sides of the ears).

Fixing the first and forming the second beam
- Make exactly such a bundle, like the first.
- Assemble the remaining strands into a bundle and make a bundle from the bottom of the two previous ones.
- To give a special texture hairstyle, walk on the surface with your fingers.

The final stage - the creation of the last beam and giving the texture hairstyle
- The result can be fixed with varnish (optional).
The hairstyle of three bunches is a great way to stand out from the crowd, because it looks extremely attractive. In addition, in the evening you can turn it into pleasant curls, you just need to dissolve the flagella and lay the wavy curls.
Tip! In order not to create the effect of dandruff, use a water-based gel - after drying it does not turn into an untidy white mass, which can significantly ruin your appearance.
We create the effect of wet hair
Styling - the effect of wet hair has been very popular lately. Firstly, it is suitable for all occasions - it can look everyday and festive, you just need to choose the right accessories. Secondly, to make it will not make the big efforts, and thirdly, and the most important - you will have an attractive appearance.

Wet strand effect created with a diffuser
Wet styling for long hair is as follows:
- Wash the hair and blot it with a towel.
- Apply a styling agent - gel, mousse or a little wax.. It is better to use a special gel to create a wet effect, which will not be difficult to buy, because the price is completely different, which allows you to get a tool for different segments of the population.
- When applying strands, wrinkle and squeeze in your hands. Do not overdo it with the amount of styling agent so as not to weigh down the strands.
- Take a hair dryer, it is better if you use a nozzle diffuser, with which you can formulate the desired effect, while not damaging the structure of the hairstyle.
- Do not use strong airflow so as not to fluff the styling.
- After drying each strand in such a way, formulate the hairstyle and fix it with varnish.
Likewise, wet styling is done on short hair, which at the end can be slightly tousled, lending to negligence. You can also make the hair perfectly smooth and sleek - apply the gel, make the parting obliquely and smoothly comb.

The effect of wet curls is quite popular
Ways to create hairstyles on wet strands - many. And if you do not have time to dry the hair, such styling is a clever way out. Experiment with options and you will always look great.
The video in this article will complement the information on the varieties of laying on wet strands.